No Halloween cemetery display would be complete without tombstones. I used to make mine out of cutout cardboard boxes, with painted fronts and letters. They did okay but definitely weren't very realistic. And one Halloween when the wind and rain started up, it pretty much destroyed them anyway. I wanted something better and the only ones I found in the stores were expensive and too small to be believable.
This is when I discovered the technique of making these things out of extruded foam boards (now referred to as XPS foam sheets). The material is available at most any home store here in Utah (Home Depot, Lowes, etc.) in 4' x 8' sheets or sometimes 2' x 8' sheets. You can get varying thicknesses, most commonly 1", 1-1/2" and 2". They used to stock 3/4", but I haven't seen that in a while now. Just make sure to get the Extruded Polystyrene foam (XPS) and not plain Styrofoam. The difference is that this material is not small particles pressed together like styrofoam. It is a uniform material with a high compression strength that is great for this purpose. The two most common brands you will find are Dow (blue sheets) and Owens-Corning (pink sheets). Owens-Corning calls their product "Formular", and Dow calls theirs "RS Styrofoam" although it is certainly not just regular Styrofoam. Regular Styrofoam (usually white sheets) would work for simple tombstones, but won't hold together cleanly at the edges when you cut it. You cannot carve the lettering as described below with Styrofoam.
The basic idea is to take a sheet of foam and cut out your tombstone. I use a handheld jigsaw, but there are also hot wire foam cutters available at craft stores like Michael's. If you use a saw like I do, or sandpaper later in finishing make sure to where a breathing mask to keep those little foam bits out of your lungs! Print out your epitaphs or wording on your computer and tape it to the front of the tombstone. Then you take a sharp X-Acto knife blade and carve out each of the letters with a V shape into the foam. This is the hardest and most time consuming part. You can use a Dremel tool to speed things up, but at the expense of quality and realism. After your done with the epitaph, the tombstone is painted to your liking.
I think the best place to start out is your local cemetery where you can get ideas of actual epitaphs, tombstone shapes, and finishes that you want to mimic. Of course this is the general process. For the specifics I will refer you to the best tutorial for tombstone making that I have found on the web, Moonlit Project. (Note this is a cached version under the Wayback Machine web archive as the original is no longer online). John Nelson has done a fantastic job at walking you through the process step by step, from start to finish. Make sure to check out the tutorials on all three types; standard, ornate, and obelisk.
Here are my thoughts on painting tombstones after doing this for a while:
Most of my stones were painted with standard latex house paint. My technique for coloring is just to experiment first, usually by mixing some of the latex paints I have to come up with something different than what I already have. No real direct formula for doing so, just try to emulate the vision of what you have in your mind, or just try to mimic another stone or finish you have seen and like.
Once I have settled on a base color I like, I paint the entire stone with 2 coats and let it dry. At this point the tombstone is pretty plain and not too interesting, but then you start to layer different colors on it. I use different colors, maybe dark greens for mossy water stains, or grey or black, but you can vary other colors for interesting effects too, such as reds, yellows, or blues. The trick is to water down the latex paint a bit so that it is easier to work with and more transparent as you want your layering of these different colors to be subtle. Also with the accent paints watered down, you can brush or smear them on with a rag and then wipe them off with a clean damp rag if you don't like it. Usually I will dab some of the watered down paint on, let it sit a few minutes and then pull some of it off with a dry rag. Let it dry and then go back and repeat with more, or a different color. Just don't rush the process, best to take it slow and let the stone evolve as you study it at each phase.
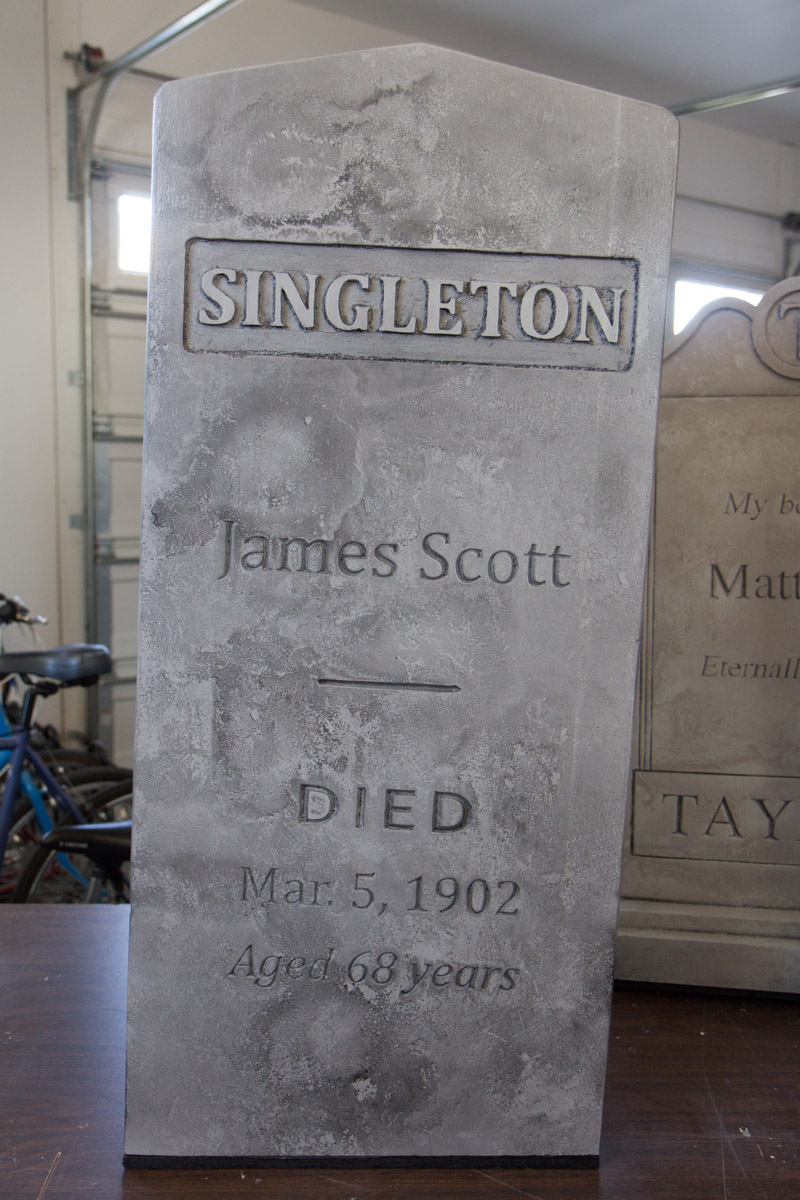
If you use any kind of spray paint on the foam, be sure you have first protected the stone with 2 coats of a latex base paint. That should seal all the foam so that the spray paint aerosol won't eat away your foam. Do not spray paint the raw foam as it will dissolve it (unless that is the effect you are going for, and then be careful and test this on a scrap piece first). That being said, I have painted some stones with spray paint, but again only after first sealing it with latex paint. After applying 2 coats of latex and dry, I used one of those granite spray paints on one of them. On some more recent ones I tried a different technique. I painted a base color to seal the foam, and then used a spray bottle of water to heavily coat the front of the stone laying flat, and then spray it with some black spray paint. Leave it for just a minute and then blot up the paint and water with a rag. It leaves a pretty blotchy but effective random look. You could use other colors too. The Singleton stone (below) is a good example of this. It was base coated in latex and then the spray bottle with water, followed by black spray paint technique.
Lastly after the stone is pretty much done, I like to use some watered down black or brown to darken the lettering on the stone. The added contrast makes the epitaphs easier to read. I also apply some around the base of the tombstone to give it a dirty/aged look. But remember if you get too much on you can blot or wipe some back off with a rag.
One question I have gotten is how do I anchor my tombstones so that they do not blow over by the wind. What I do is use a piece of CDX or plywood (3/8" thick) for the base that is painted black. I prefer this method to embedding PVC within the tombstone for rebar as I don't want to risk damaging the tombstone. I cut a rectangle out that is the width of the tombstone and several inches more than the depth of it. I paint it with a couple coats of black latex paint to protect it from moisture and also hide it. I attach the tombstone to the wood base with clear silicone, so that the tombstone front is flush or slightly overhangs the wood, and the rest the wood extends to the back.
 I have drilled a single hole in the back of the base so that a large nail spike can be driven into the ground to hold the tombstone if the wind catches it. Be very careful when driving in the nail spike, you don't want to hit your foam tombstone. Click the photo thumbnail to the left for a picture of the back of one of my stones to illustrate. One drawback to this method is the extra storage space the attached base takes up, but the advantage is that you can set the stones out quickly and they will stand on their own so that you can adjust your layout before staking them into the ground. One tip: when removing them just grab the back of the wood base by the sides and rock back and forth to pull up and the nail spike will pop right out of the ground.
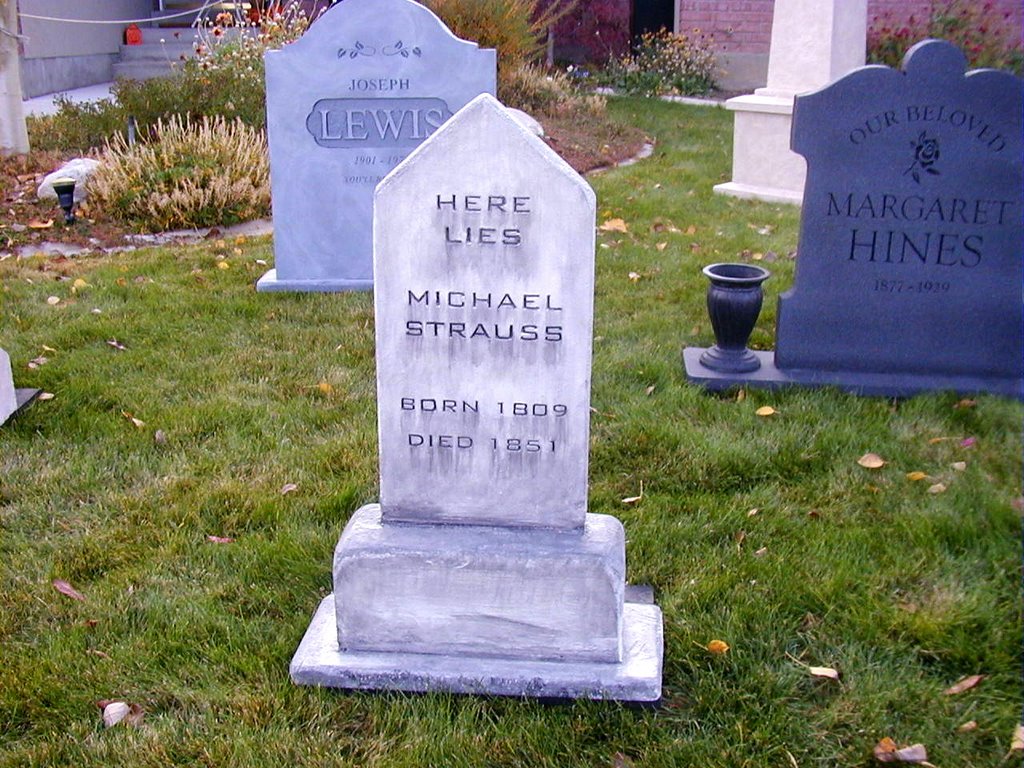
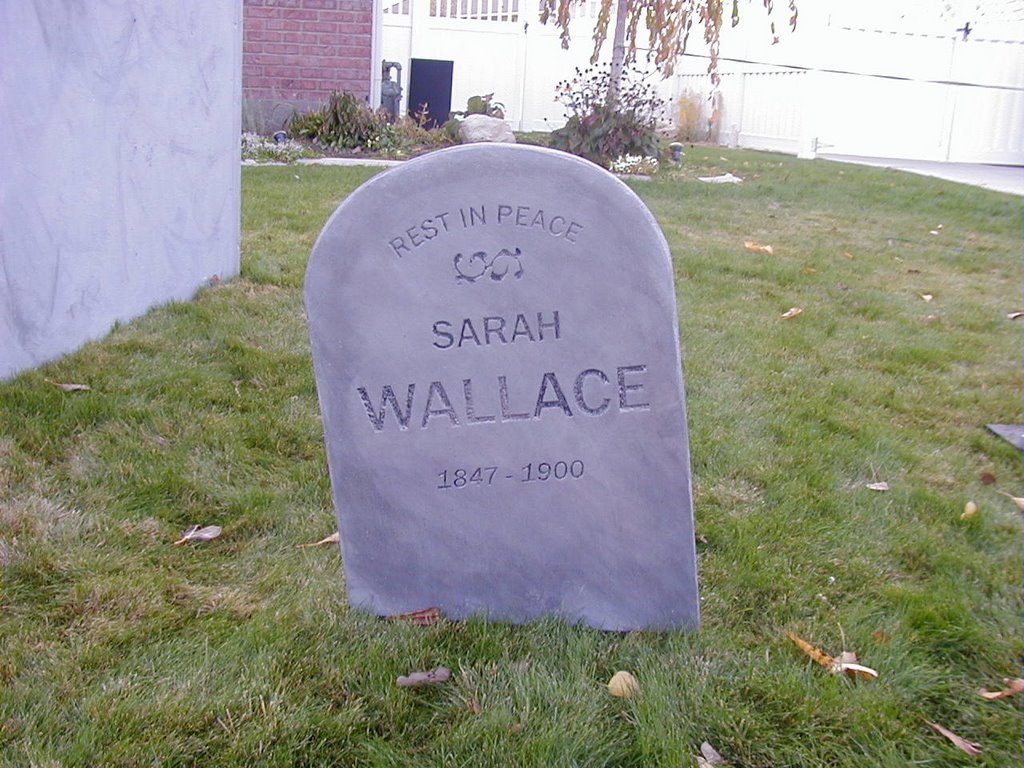
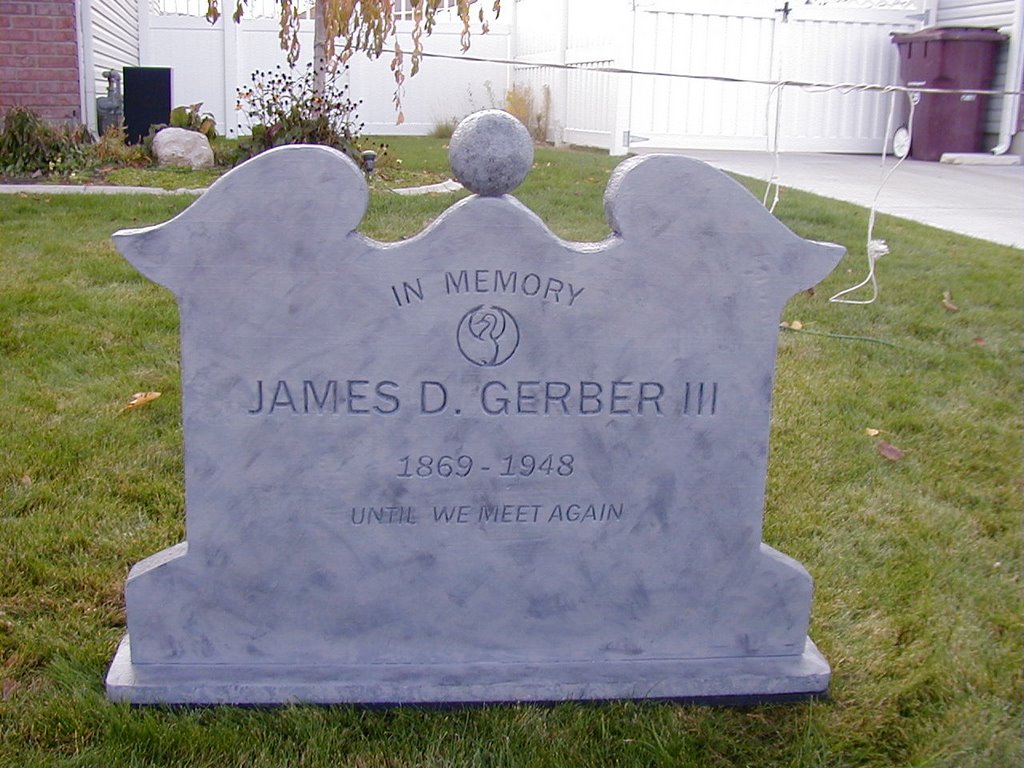
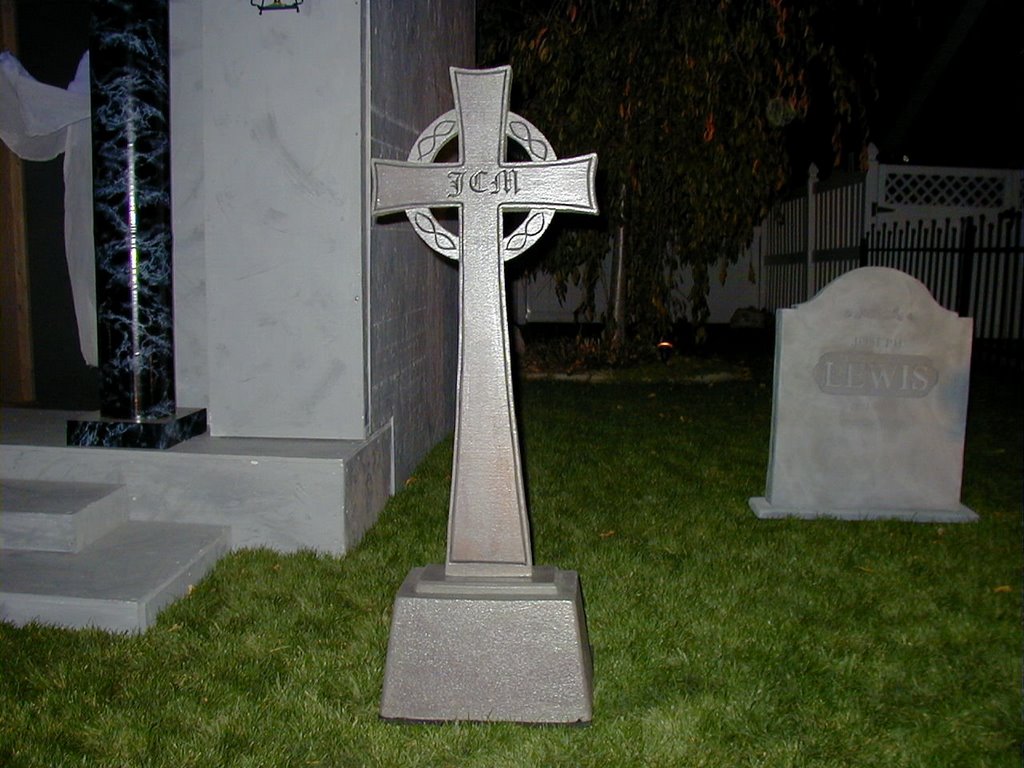
Here is a photo gallery of each of the tombstones at Raven Manor along with the year they were added...
 |
2001 - This one is made of two identical pieces of 2" foam glued together to give it a 4" thickness. The base is a standard 1" strip. This is my first attempt at raised lettering. I used the X-Acto knife to cut around all the letters and the outside oval. Then I used a dremel tool to hollow out the area around the letters. |
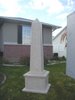 | 2001 - Our obelisk built from 1" and 2" pieces from John Nelson's detailed plans. A table saw is really needed for this one to do the bevel cuts. |
 |
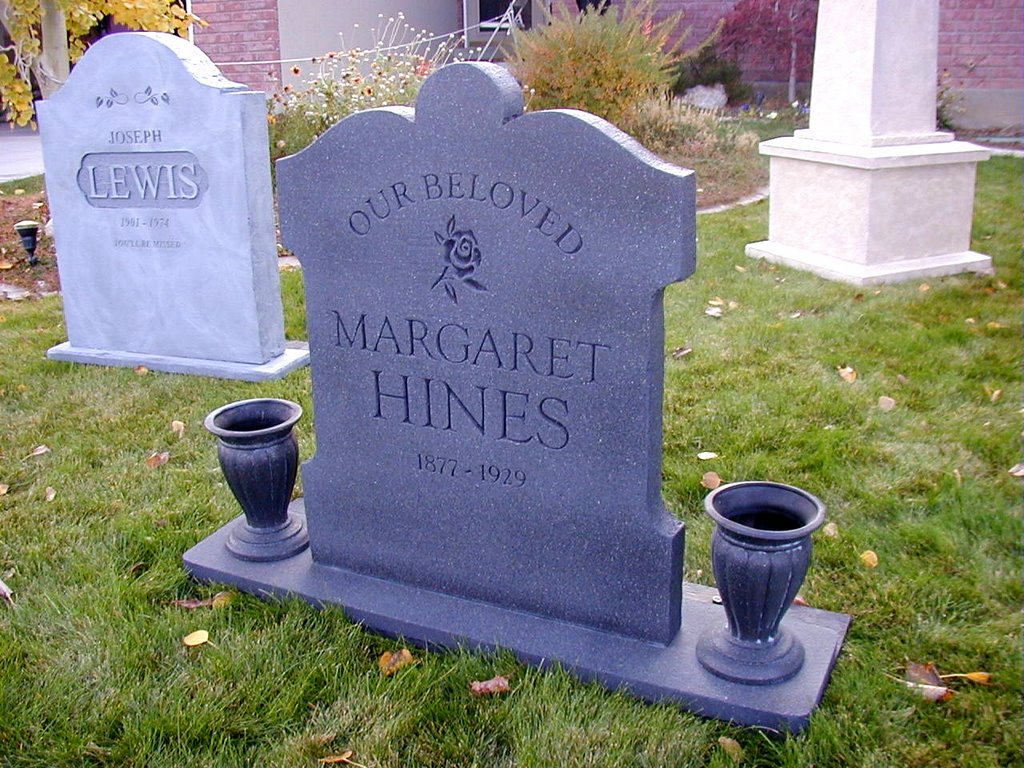
2001 - This one is a 2" piece with a 1" base. The base was widened so 2 resin vases found at a store could be glued on each side. The rose on this one works well and was just a piece of clipart we found. As far as clipart goes, for this project simpler is better. |
 |
2001 - For this one a 2" foam piece is surrounded at the base by short 2" pieces. The front and back base pieces were beveled on a table saw at 45 degrees. |
 |
2001 - One of my favorites... This is a 1" piece surrounded with 2" pieces at the base similar to the last one, except without any beveled edges. The edges were heavily sanded round to give it a very worn look. It also looks older from the painting, including the stains from the letters. This one is almost identical to one of the examples at John's site. |
 |
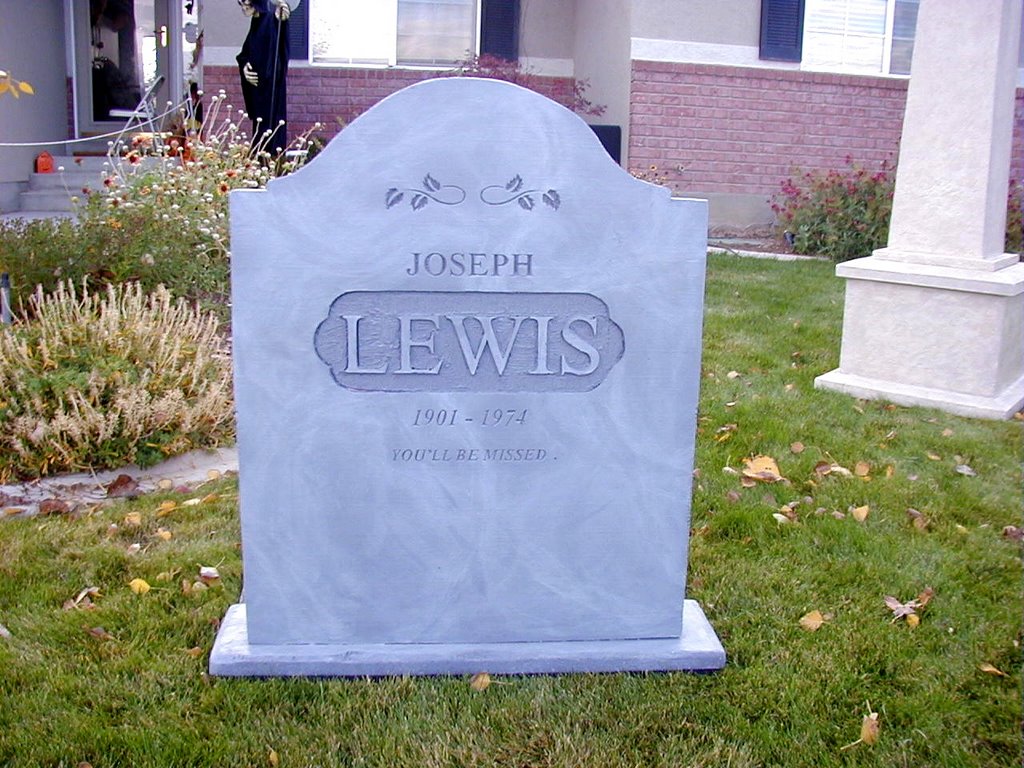
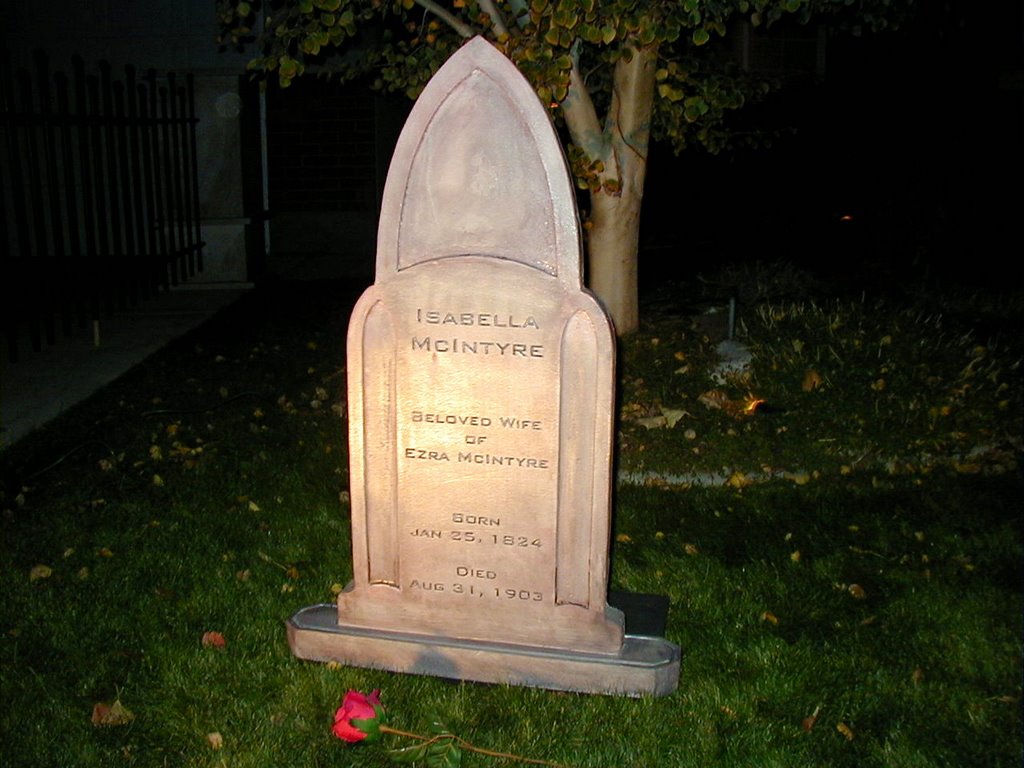
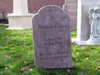
2001 - This was the first stone I created. I started simple with the common shape. It is just a 1" piece. The bottom edge was cut at an angle to give the appearance that it has sunk into the ground unevenly. |
 |
2001 - This was a fun shape to work with. It is a 2" piece with a 1" base. The ball on top is just a styrofoam craft ball. I used a small wooden dowel to attach and glue the ball to the top to give it more strength. |
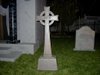 |
2003 - We wanted to add some different styles and shapes this year. This is one of several crosses. The base is actually a cheap Styrofoam cooler upside down. |
 |
2003 - A great addition to our collection is this unique stone. I used the Dremel Tool to route out the arched sections. My wife did a great job painting this one to look like sandstone. The gothic shape gives the graveyard an ominous feel. |
 | 2003 - This one is a personal favorite with the name and epitaph taken from a great comedy on PBS. Are there any other fans of the show out there? It was tricky cutting out the curved cross shape, but it turned out rather well. |
 |
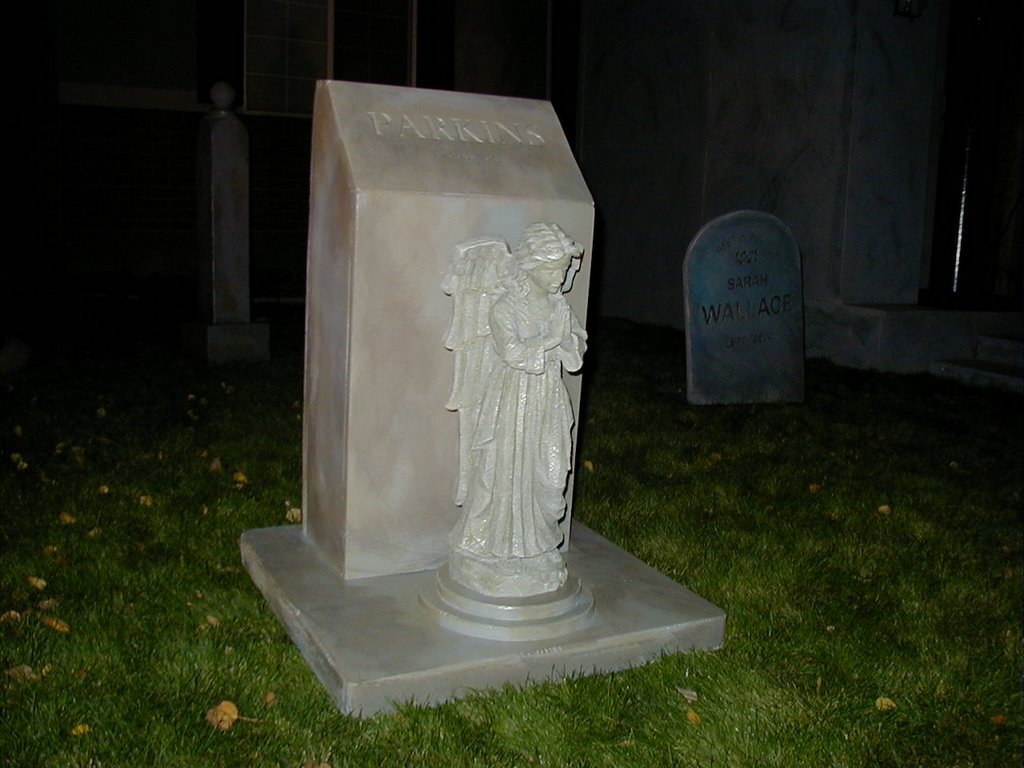
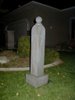
2003 - The main portion of this one is made from 3/4" extruded foam. There is a 2" slab for the base. The resin angel from a local store's garden section just sits on top. |
 |
2003 - A classic wedge shaped stone, made from 3/4" and 2" foam. |
 |
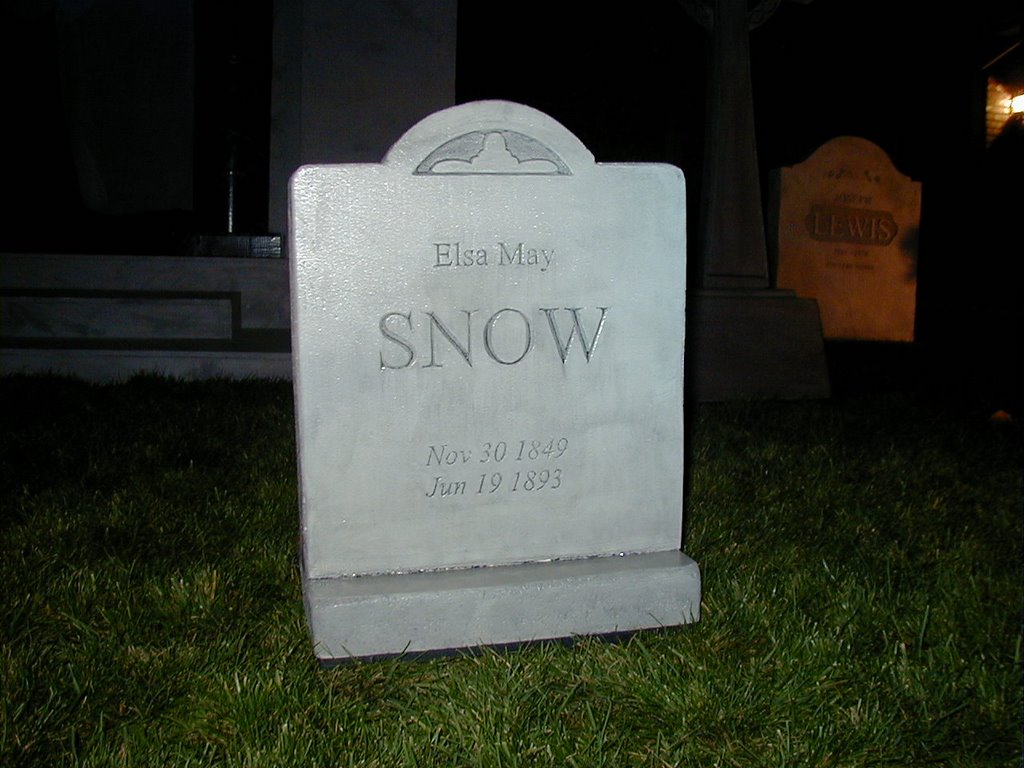
2003 - The smallest stone I have made, and I think I need to make more this size. It was small because it was the last one I made from the remaining material I had. I chose Snow out of the blue for the name, and guess what... that Halloween it snowed all day and night! |
 | 2003 - This one was fun to make. The ball on top is Styrofoam. I mitered all the corner pieces and fashioned a makeshift lathe from my electric drill to make the piece just below the ball. No name on this one, just a monument. |
 | 2003 - Kind of a unique shape for this one, it looks like an arrow with a cross on top. It was very easy to make out of a single piece of 2" foam. |
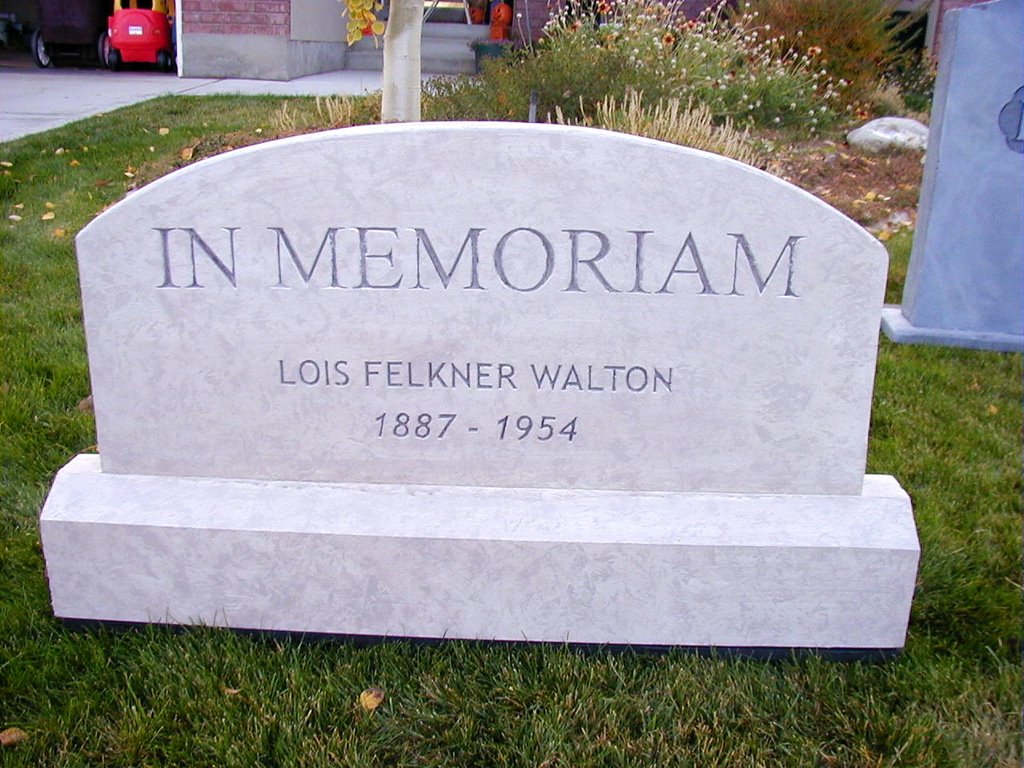
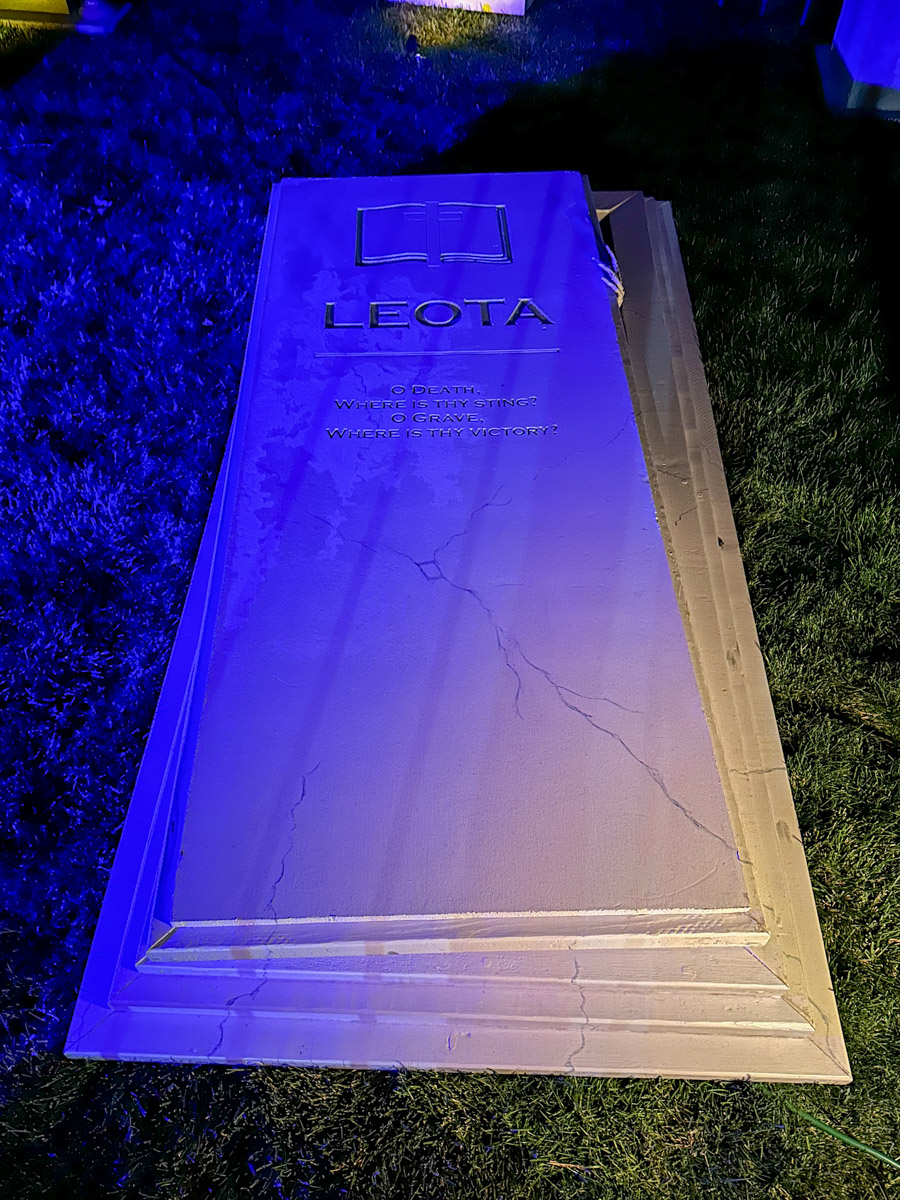
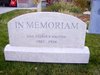
 | 2010 - Not a typical tombstone but more of a tablet tomb, the top of this is a sheet of 3/4" Owens & Corning extruded foam carved with the Leota name (a nod of respect to Disney Imagineer Leota Tombs, aka Madam Leota from the Haunted Mansion). The inscription from 1 Corinthians 15:55 in the New Testament reads "O death, where is thy sting? O grave, where is thy victory?". It was originaly a dark color in 2010 but repainted in 2011. |
 | 2010 - In rememberance and honor of Walt Elias Disney, who without his inspiration I would have never thought to create my display. It is very much inspired by the Haunted Mansion, which is mesmerizing without any need for gore or anything overly scary. The stone has his Club 33 logo and the inscription from the plaque over the entrance to Disneyland I thought was very fitting for his faux tombstone. He went too soon. |
 | 2010 - This small tombstone is in honor of my wife's grandfather Fry. He was a proud supporter of our Halloween display and a great craftsman who helped me make some of the early tombstones in 2001. The story behind the quote was that he would tell me "It's not a piano" meaning I didn't need to worry or fuss so much about the details as if it were a fine piano. For this kind of thing a little blemish goes unseen or even helps add to the realism of these pieces that are meant to be old. |
 | 2010 - A simple and very basic shape, cut with a slight angle to the ground to make it lean. The name Adeliza came from a book my wife was reading. I liked it because it sounded old and unique. |
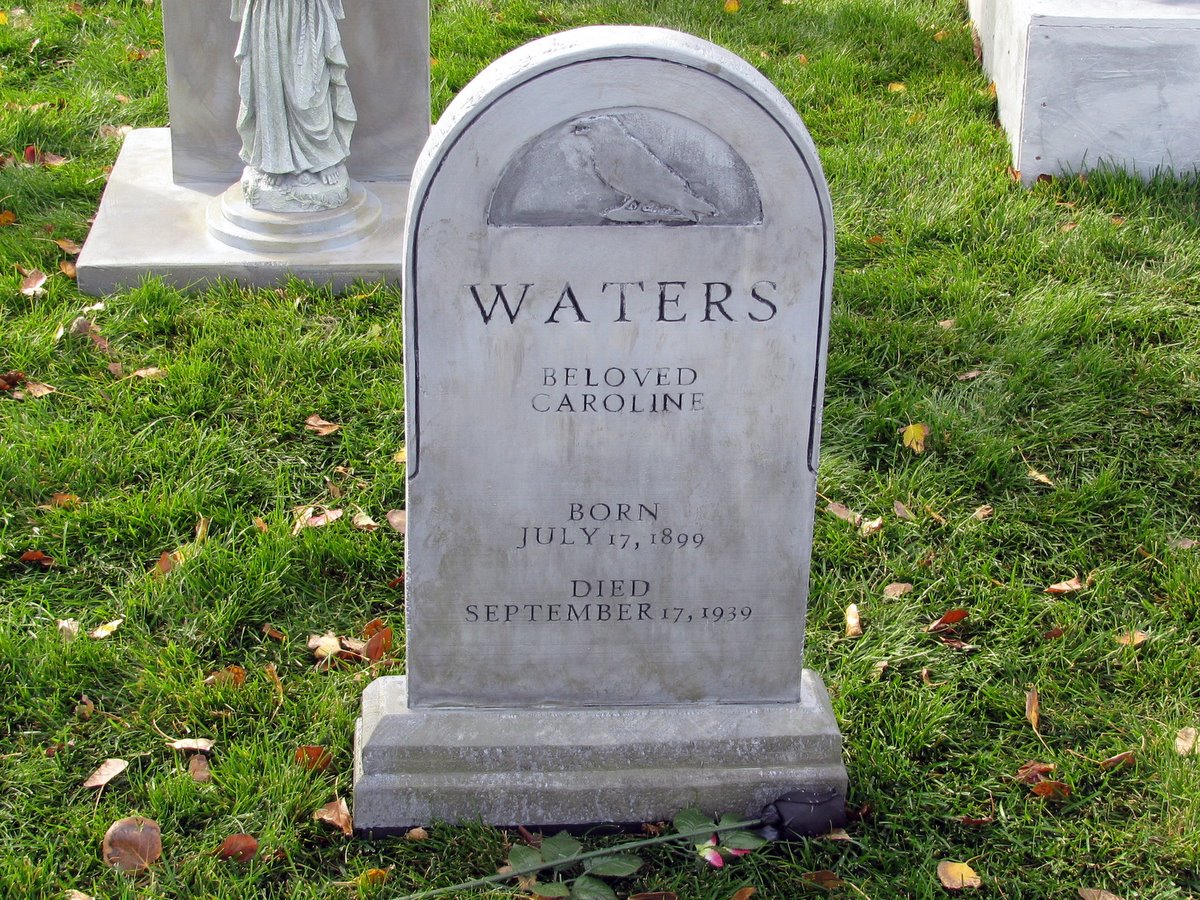
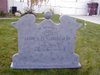
 | 2010 - A classic shaped stone with a base. The name for this one came with help from my daughter who wanted to choose the name of Caroline Waters. |
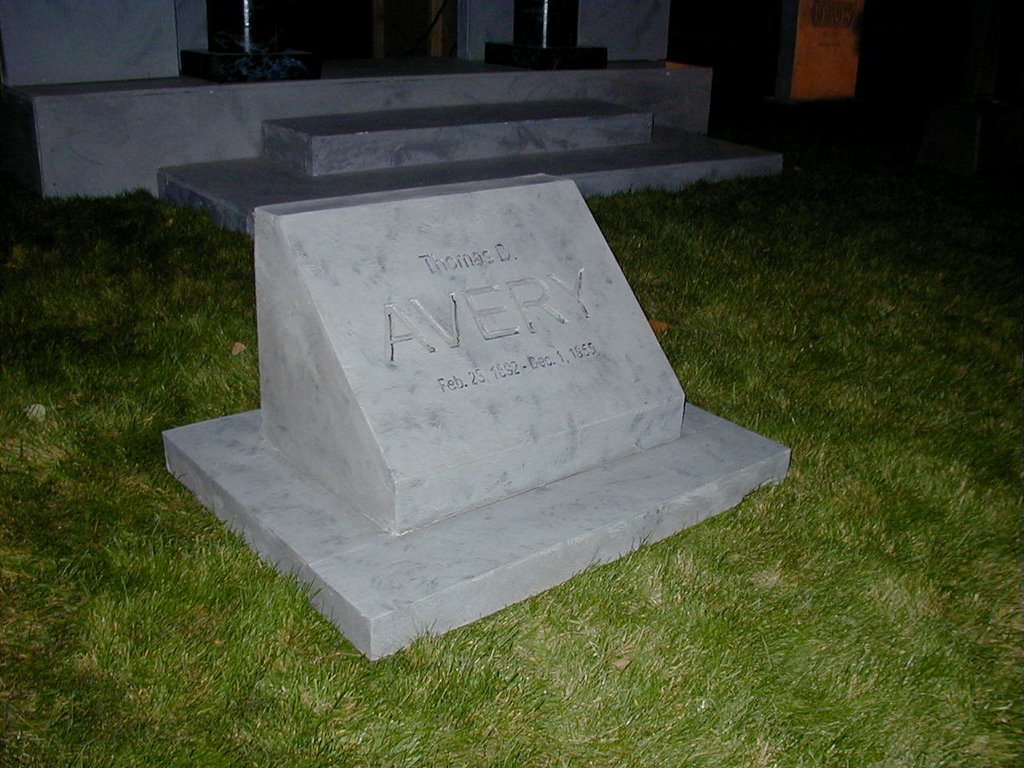
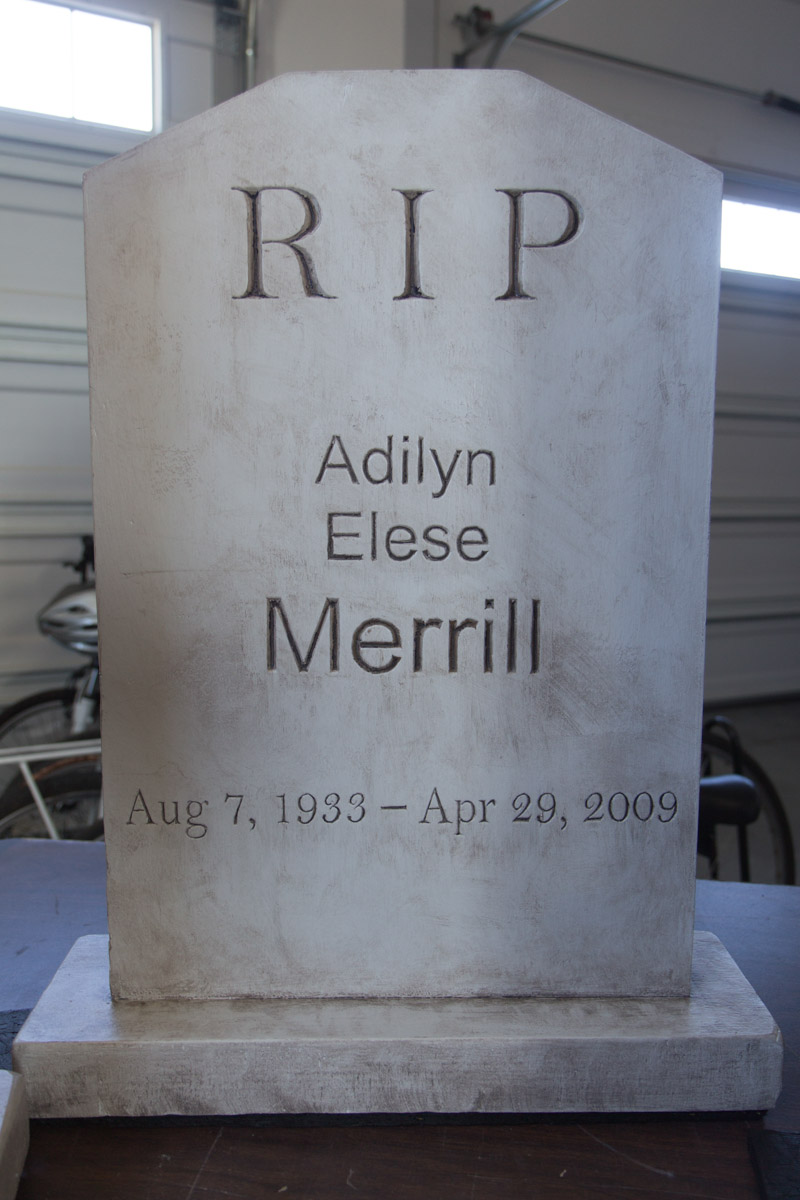
 | 2010 - I made this one after one I found a picture of on the Internet. I copied it pretty much exactly except for changing the middle initial and the years by a bit. I really liked the detail on it and the old english letter E. |
 | 2017 - This one is the design of a young fan of Raven Manor that lives next door to me. I let him decide on the design and inscription and he helped me make it. It is his tombstone, but decided to have it be a part of the display. |
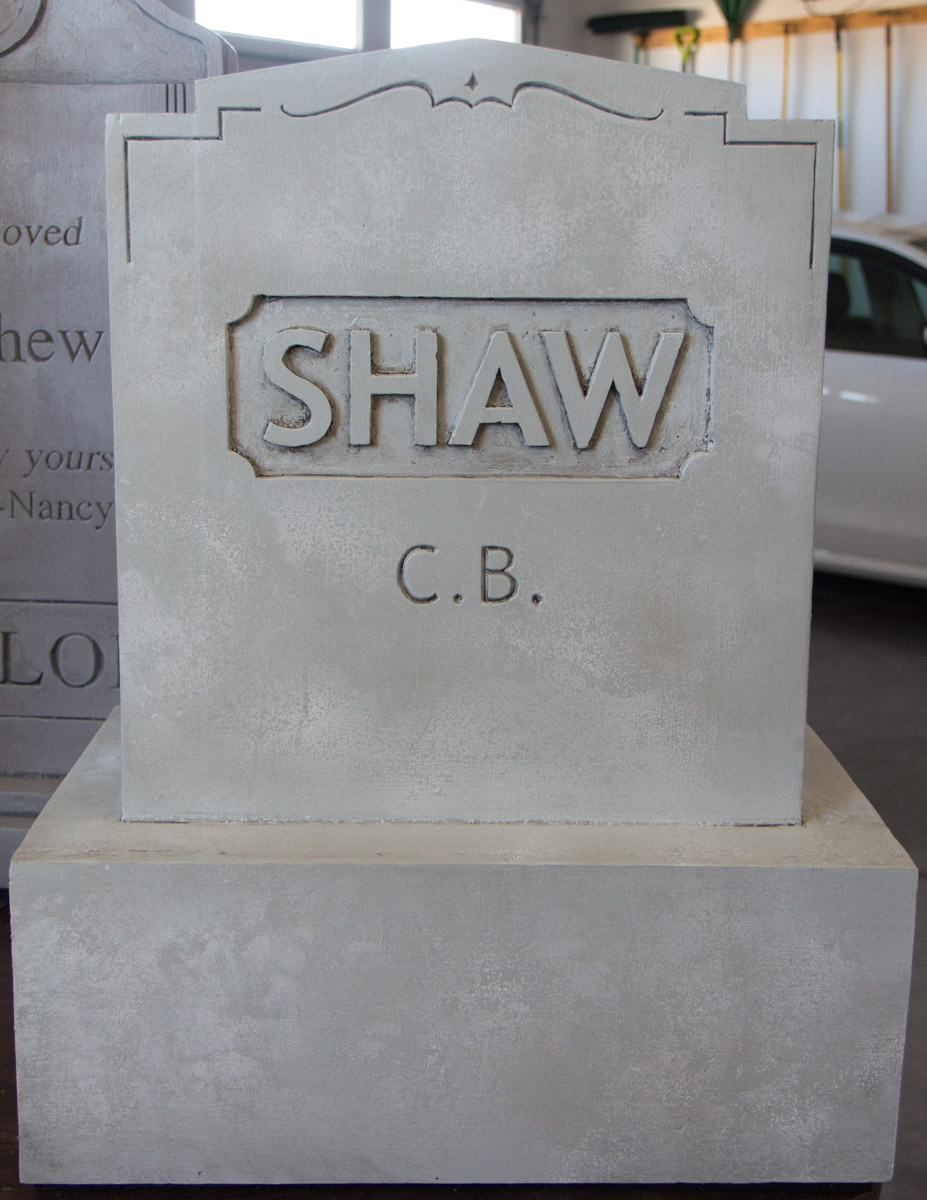
 | 2017 - Added in honor of the Shaw's who are friends of Raven Manor. They also do their own Disney or Harry Potter themed display each October too. |
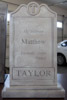 | 2017 - Added in honor of Matthew and Nancy Taylor of Bountiful, Utah. They are also friends of our haunt and run their own display on even numbered years in Bountiful. |
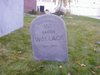
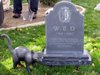
 | 2017 - In honor of Scott Singleton of South Jordan who has been a longtime friend and supporter of our haunt. He ran an amazing display of his own but recently had to retire the bulk of it. This stone honors all his great work! |
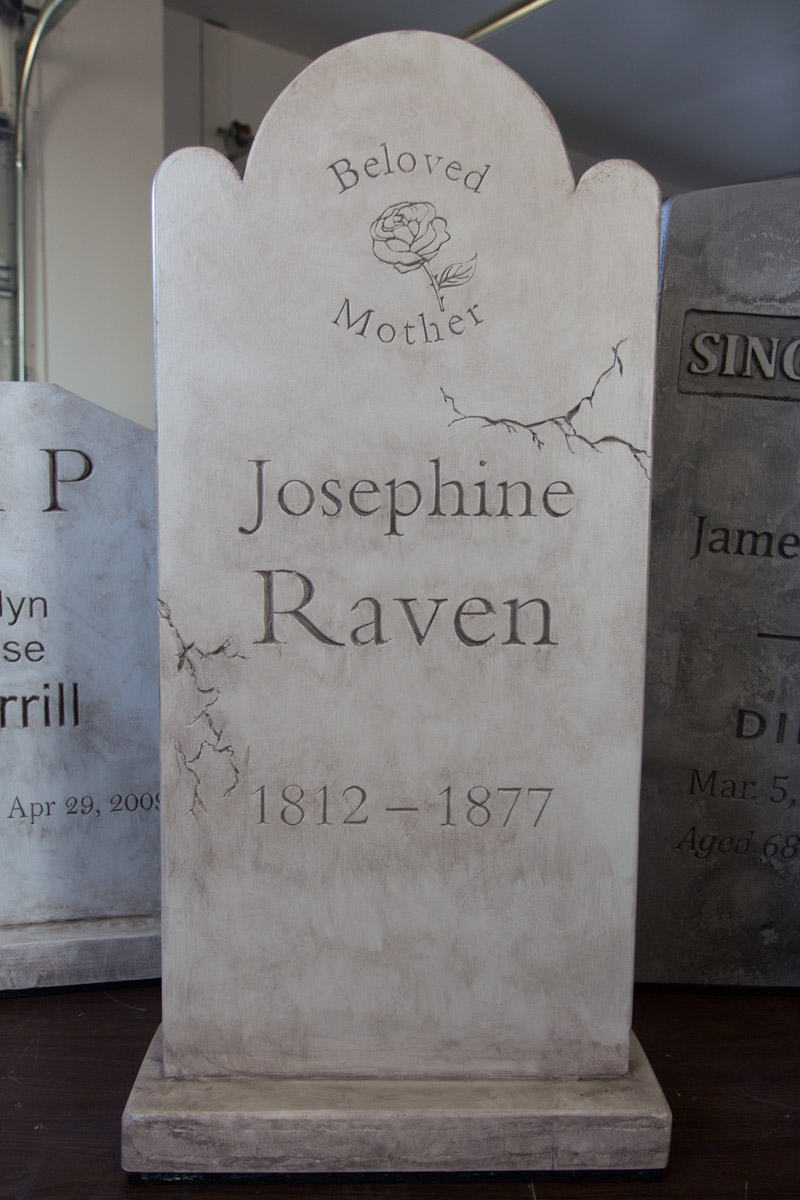
 | 2017 - I figured Raven Manor should have some tombstones for some of it's characters. This one is for Josephine Raven, who is the daughter of the founding family and mother of Darius Raven Pepper. |
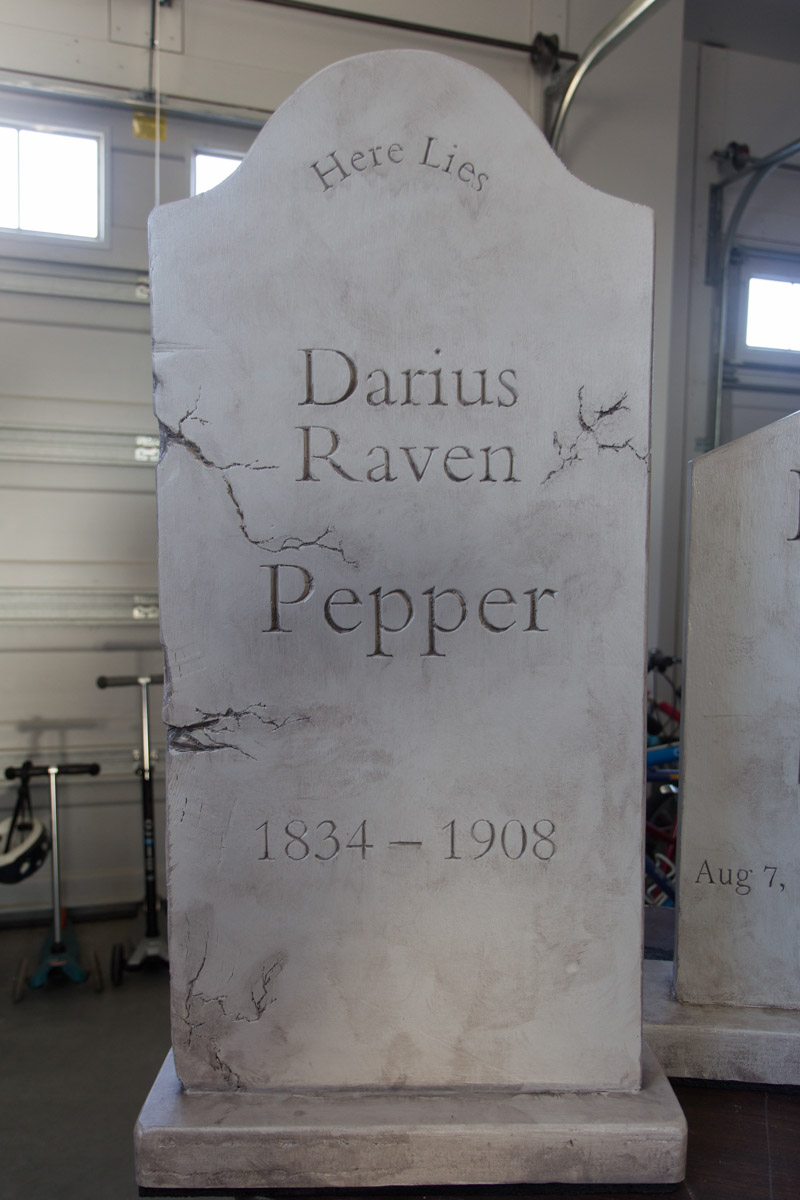
 | 2017 - Another one that is for the Raven family, Darius Raven Pepper aka Dr. Pepper. He is our Pepper's Ghost and each October looks over the cemetery from the office window to make sure all is in order. |
 | 2018 - Beloved Larry, for the Qualls family and a nod to AC/DC Thunderstruck. |
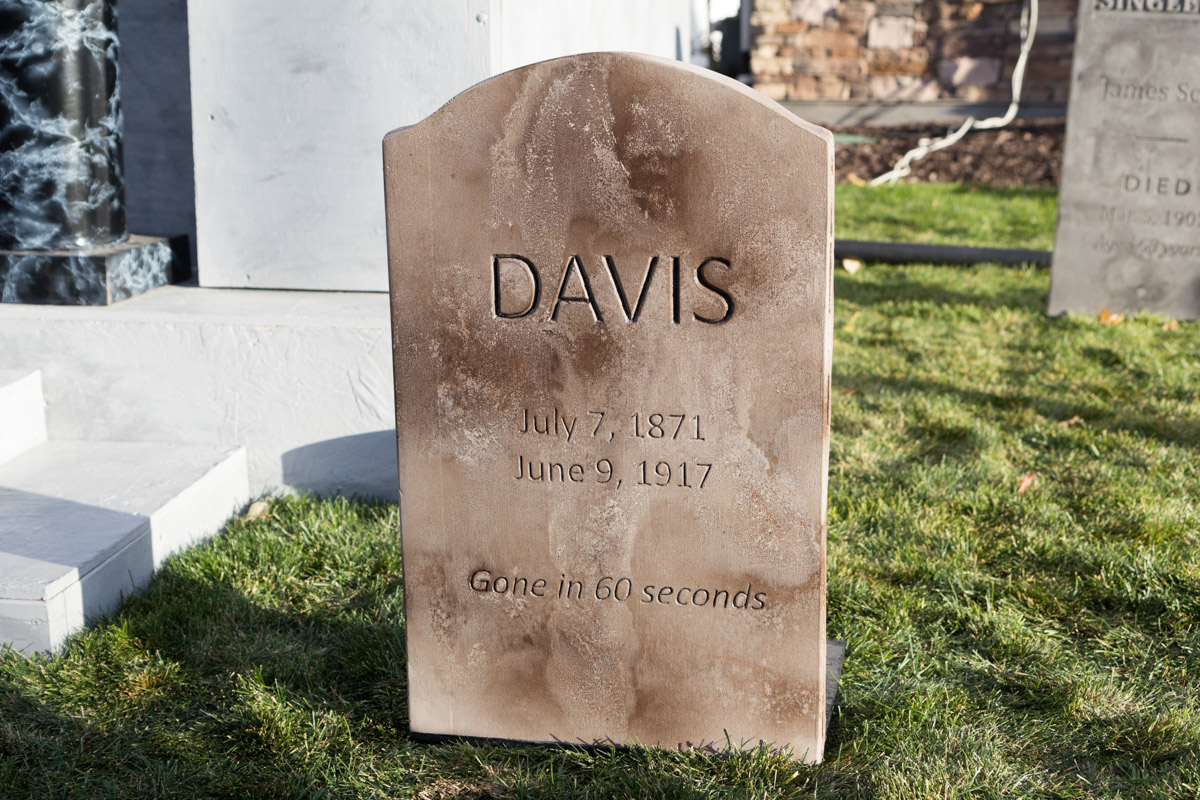
 | 2018 - In honor of the Davis family. We've always had a great time laughing about the time Brian and Amy drove us to see a Nicolas Cage movie. |
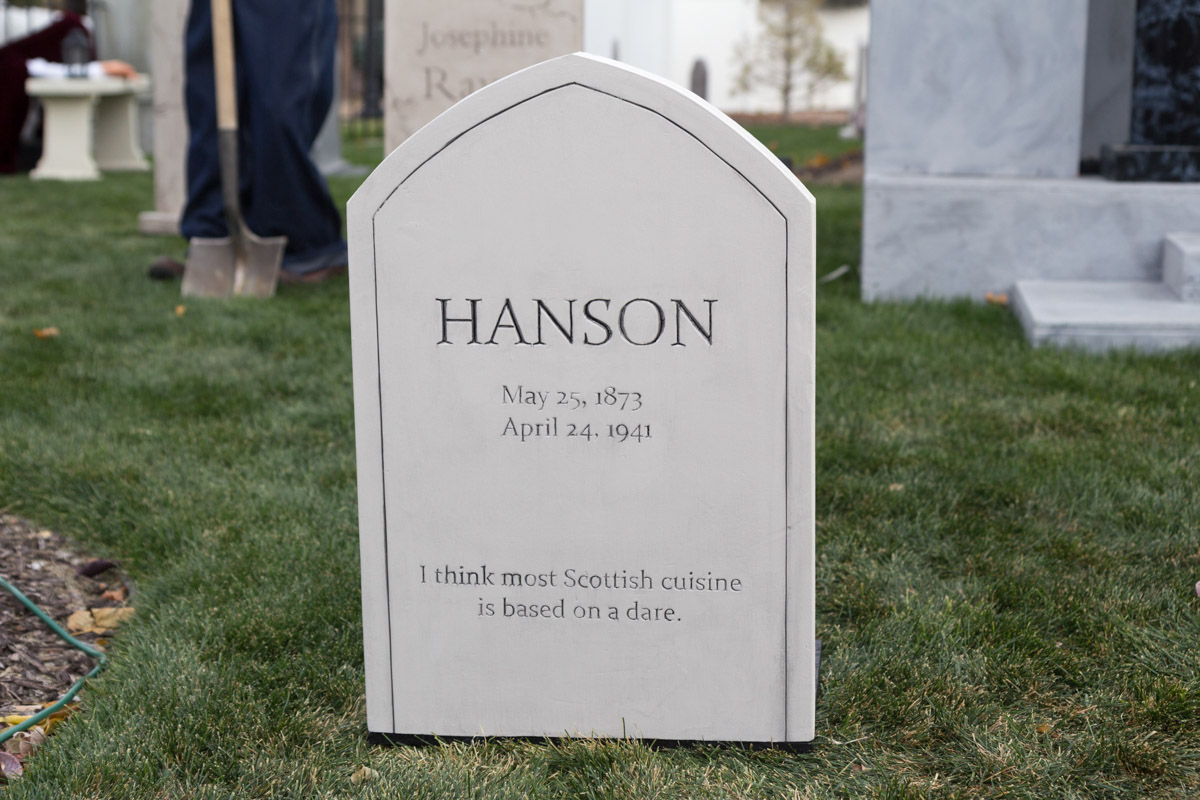
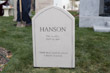 | 2018 - In honor of the Hanson family, and one of their favorite movies: So I Married an Axe Murderer. |
 | 2018 - In honor of the Weston family. Chris is a huge Oingo Boingo/Danny Elfman fan (I am too), so it seemed the perfect fit! |
 | 2022 - for the Gilbert family. This one was interesting. I was just doing a paint wash with grey paint and water mixed in the spray bottle and as the spray settled, it separated out into the different colors you see here. Very unique! |
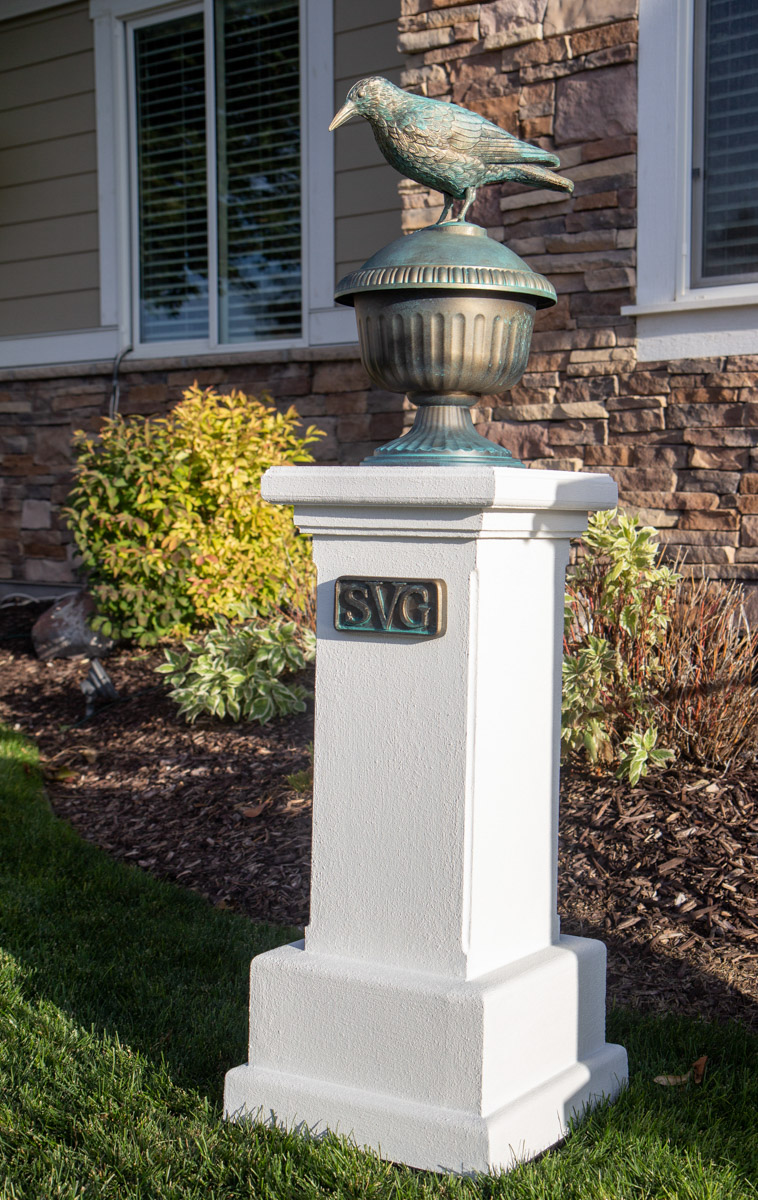
 | 2022 - This Raven Monument was one I copied from Derek Young's VanOaksProps YouTube channel. Of course Raven Manor Cemetery should have a Raven statue monument. The SVG initials are in honor of my father-in-law, who helped me setup for many years and helps give out candy for our trick-or-treaters. Thanks Steve! |
 | 2023 - A tribute to the late, great Pee Wee Herman (Paul Rubens). My most ambitious stone yet. First off, the movie Pee Wee's Big Adventure was Tim Burton's directorial debut as well as Danny Elfman's first motion picture score. This was huge! We probably wouldn't have Nightmare Before Christmas if not for this movie. The film itself and Pee Wee's character is so entertaining, so many great quotes. I used 15 audio clips from the Big Adventure movie and 1 from Jambi in Pee-Wee's Christmas Special for this project. I had a lot of fun on this one. Here's a video of it in action. |
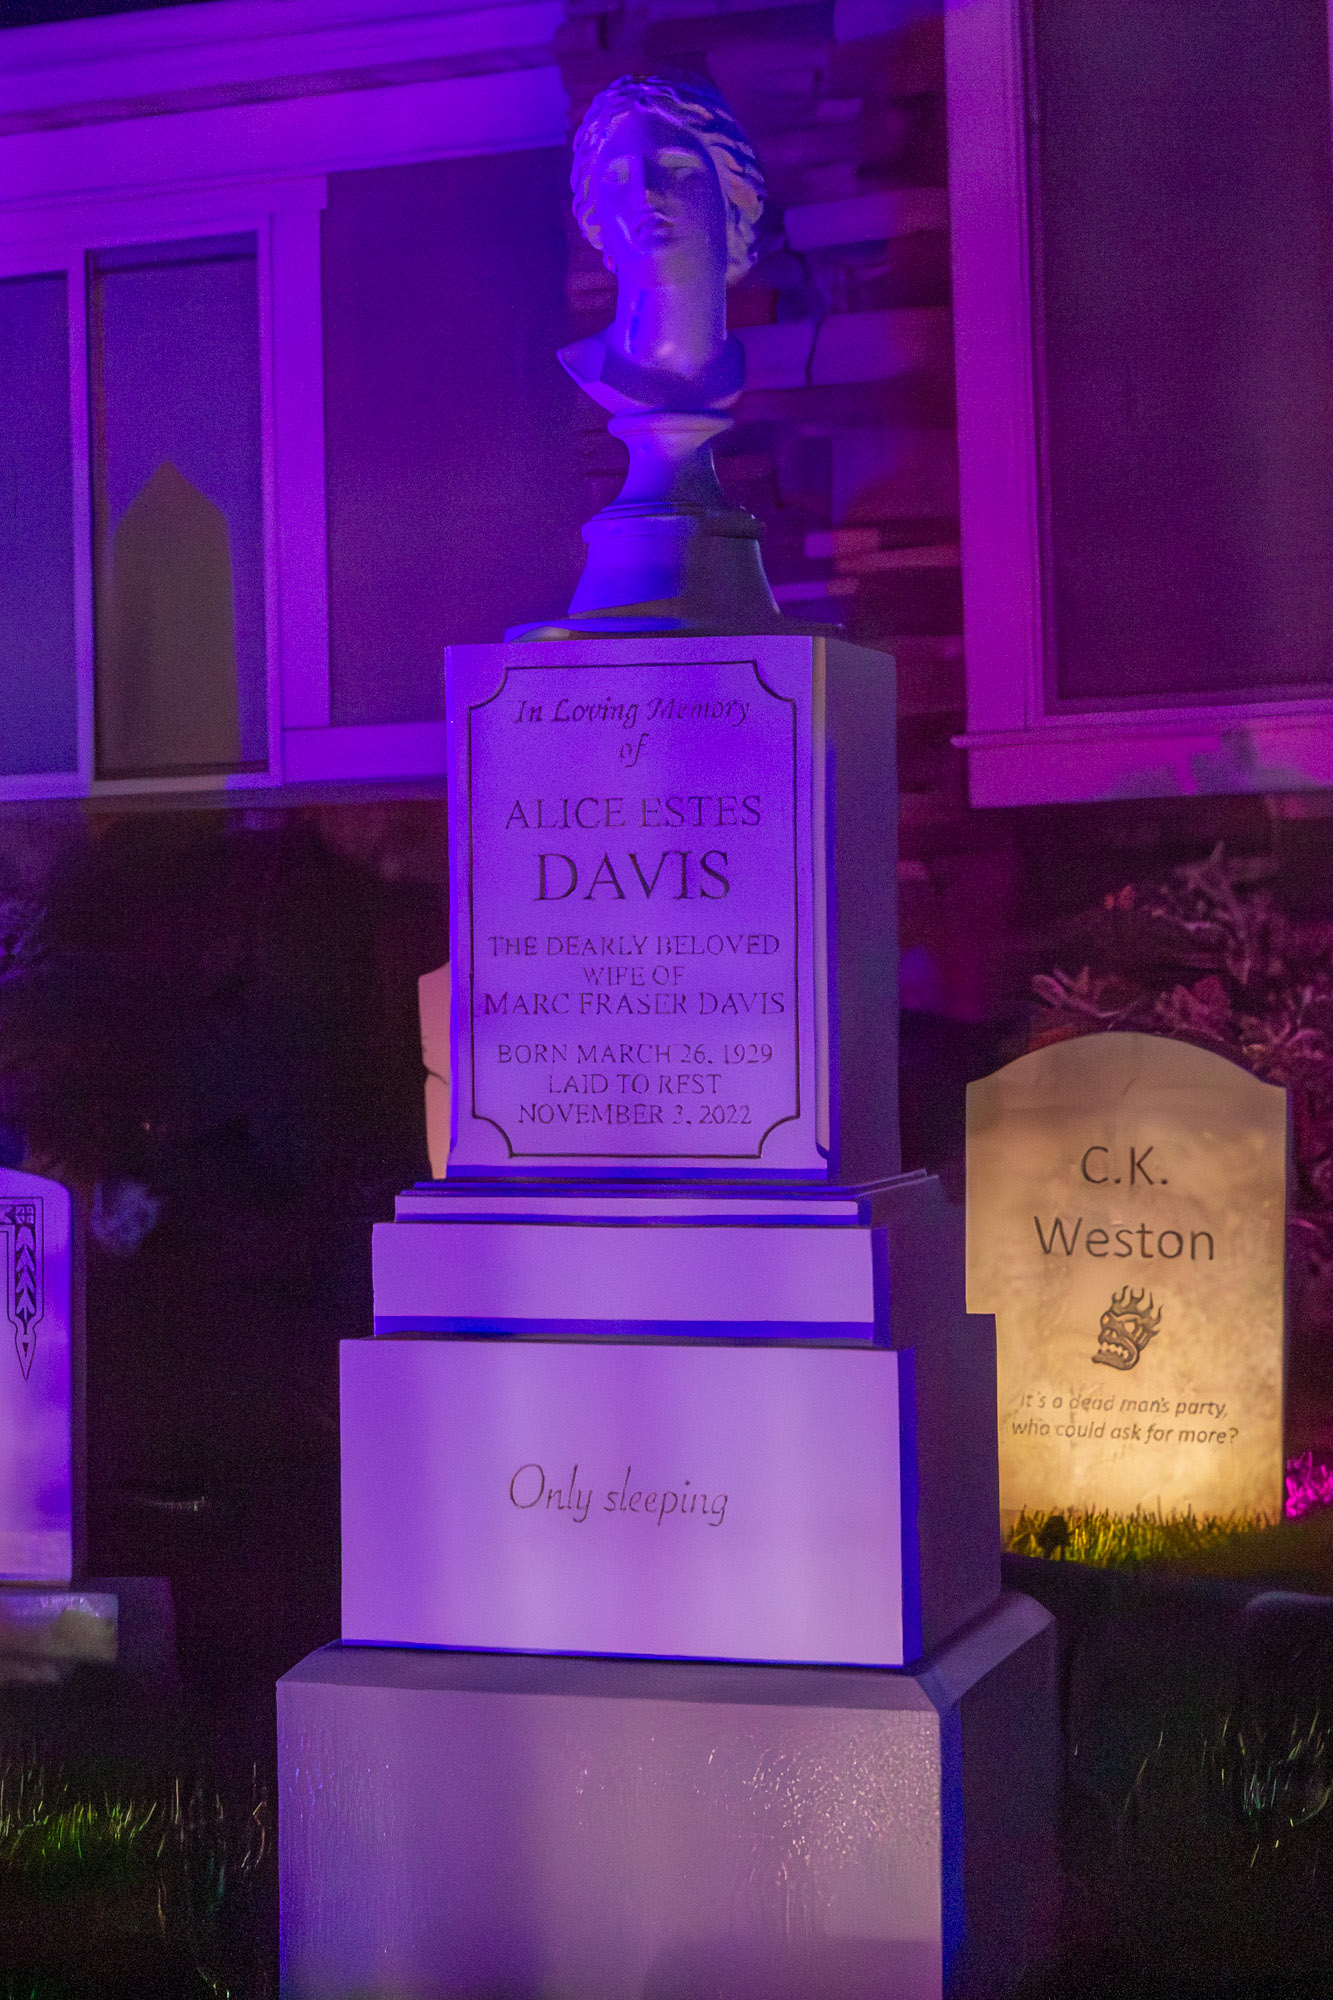
 | 2024 - I made this one in honor of two Disney Legends who were a married couple; Alice Estes Davis and her husband Marc Fraser Davis. |
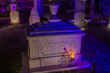
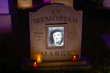 | 2024 - Another tribute stone to Large Marge, also from Pee-Wee's Big Adventure. I put this one next to Pee-Wee and they look great side by side! My wife's idea to include Marge next to PW. I made the stone similar to the memorial plaque from the Wheel-In Diner in the movie. I had an old 1st gen iPad Mini that worked great for the Marge transformation effect. Here's a short video of them together.. |